Tuesday, February 24, 2015

SoundMatters FoxL Speaker DIY upgrade to Bluetooth connection.

I purchased this speaker back in 2011 and didn't think I would want the Bluetooth option but soon realized that it would be a cool option to have.
PS: Thanks to Glenn "the walking electron" for his help on this project. 

1. Went to Ebay and bought a $6 small Bluetooth receiver that runs off of a 5V USB supply
2. Carefully open the FoxL speaker.


3. Remove the bluetooth cct from the plastic case an un-solder the 1/8 connector.


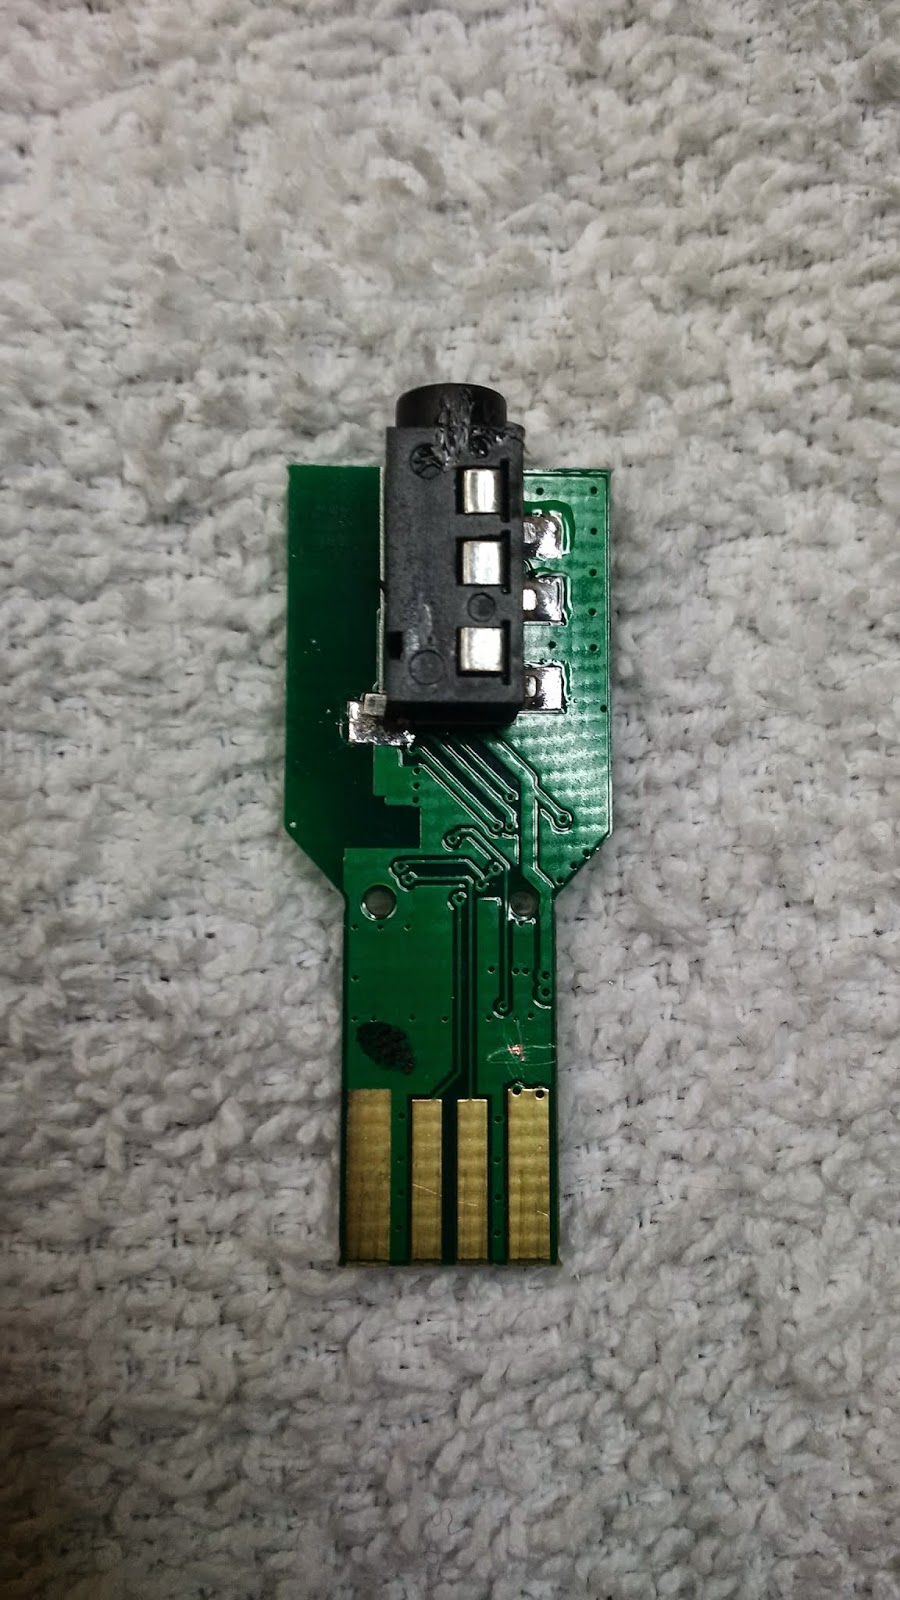
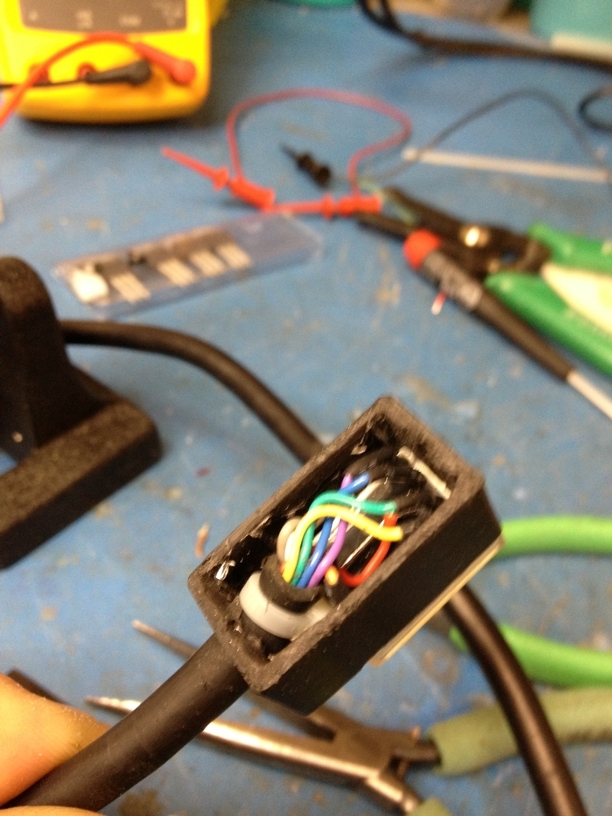
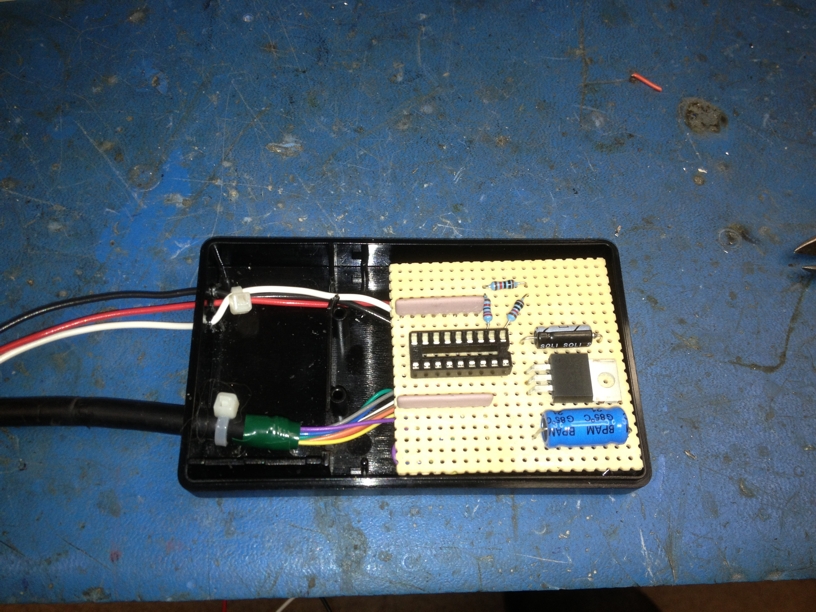
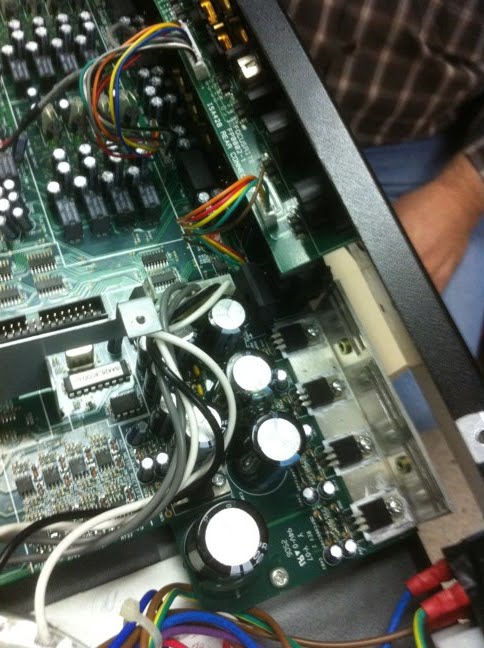
4. You will need a short piece of shielded dual pair wire (very elec noisy environment, need shield). Grab the 5VDC off of the cct brd as shown, the L +R audio as shown, the speaker neg is common to pwr supply neg.


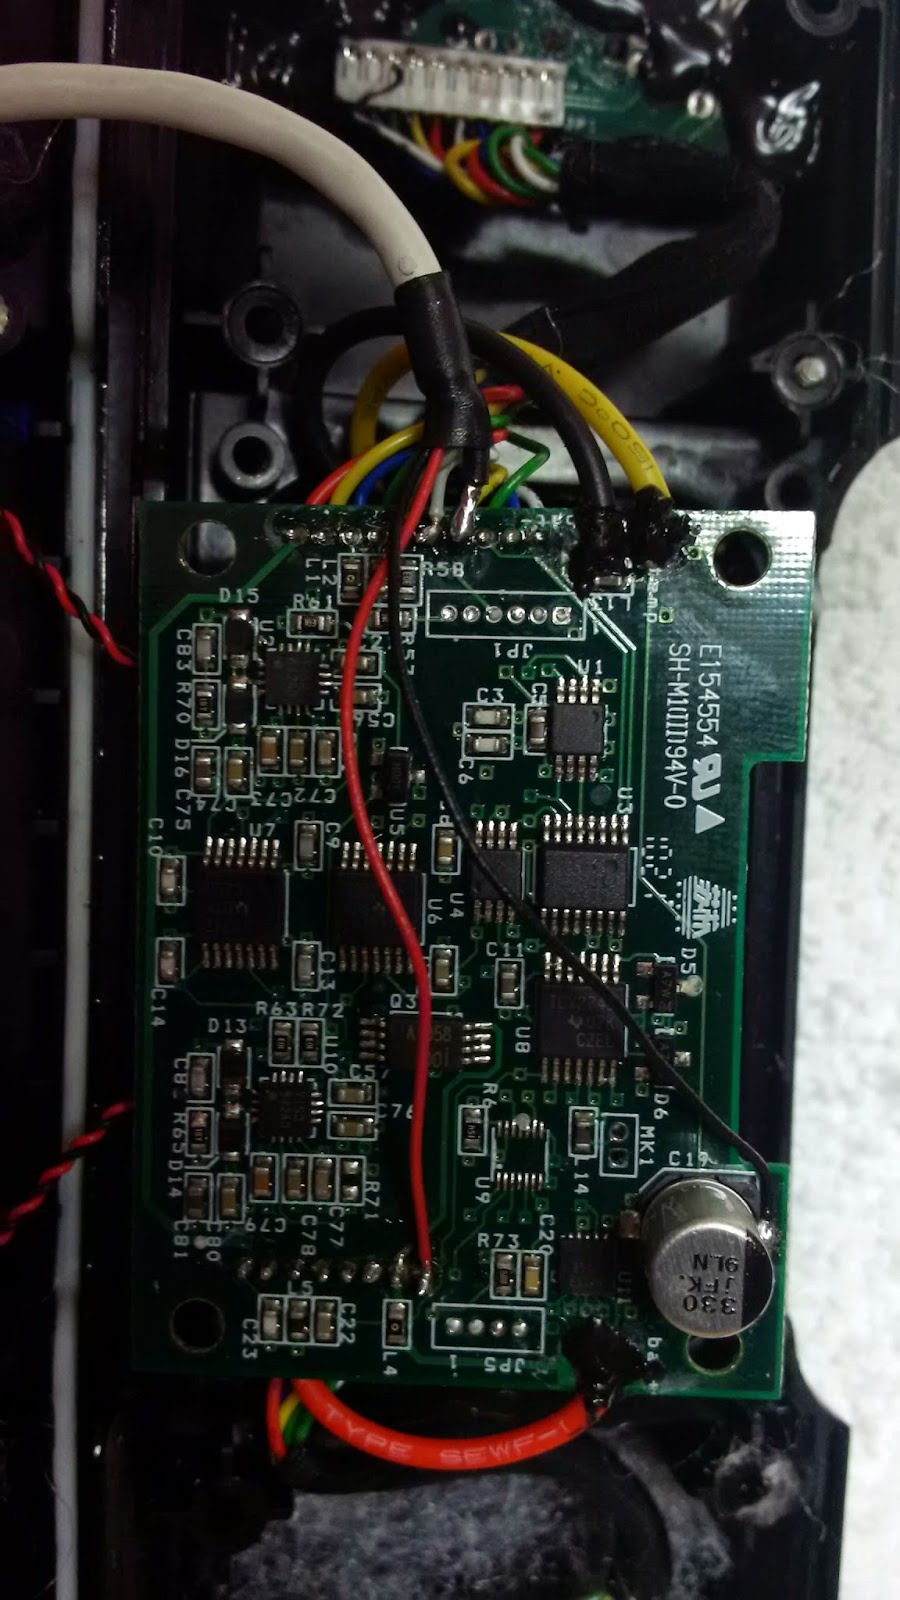
5. Mount the Bluetooth cct brd on the front side of the speaker cct brd, line up the blue LED so that you will see the blue light from the outside of the speaker when re-assembled. We used a thin piece of foam and some elec tap to hold in place but a hot glue gun would be super.

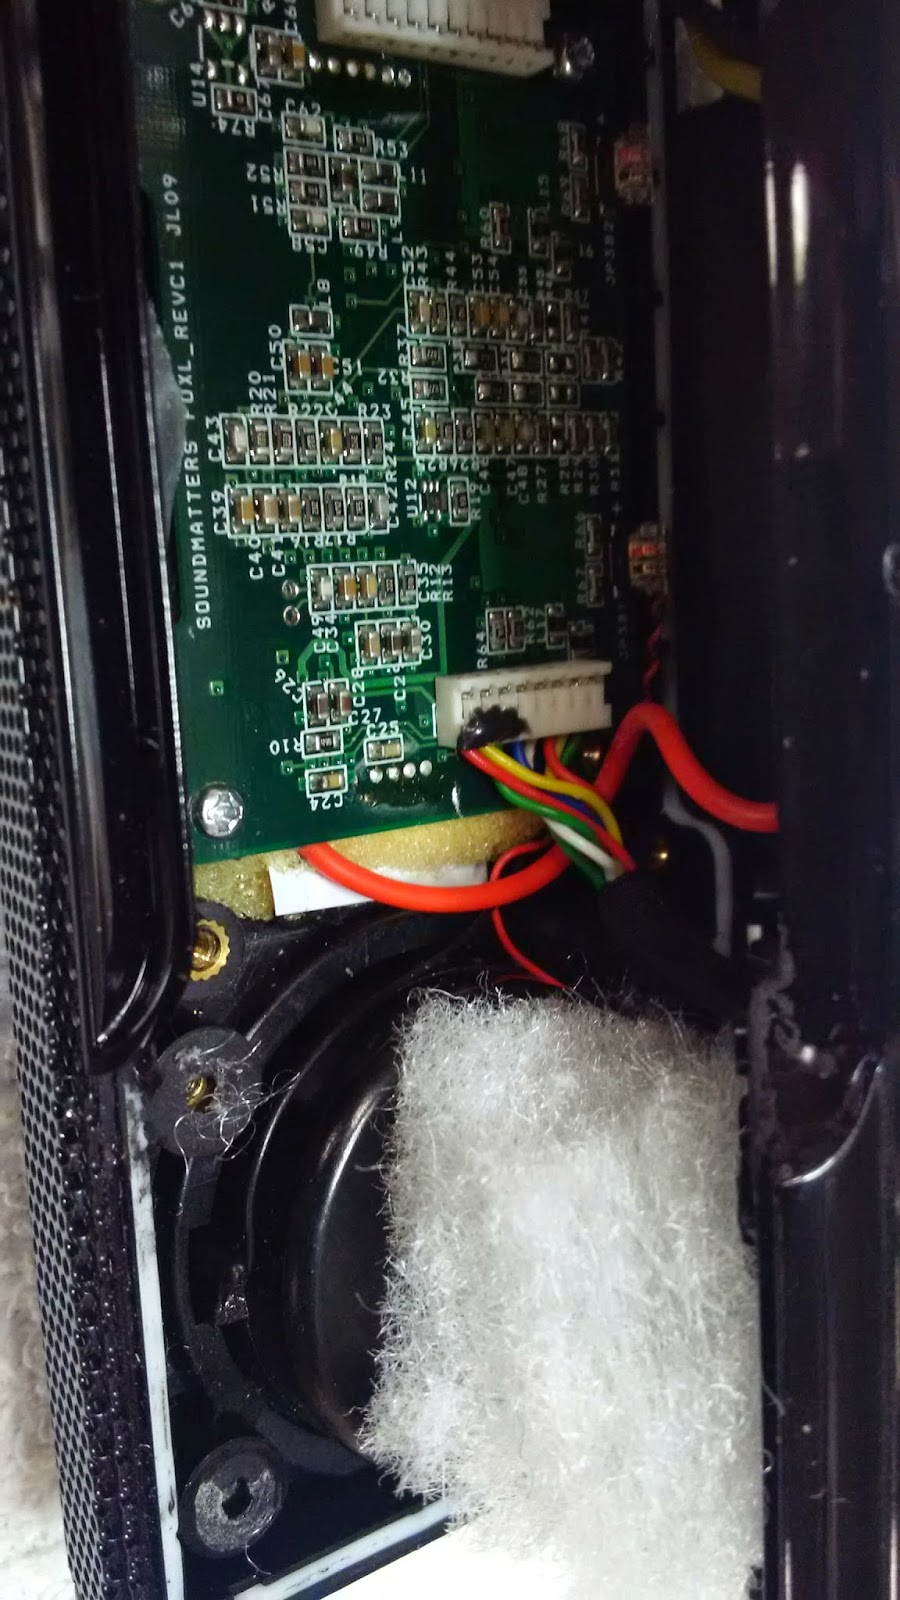
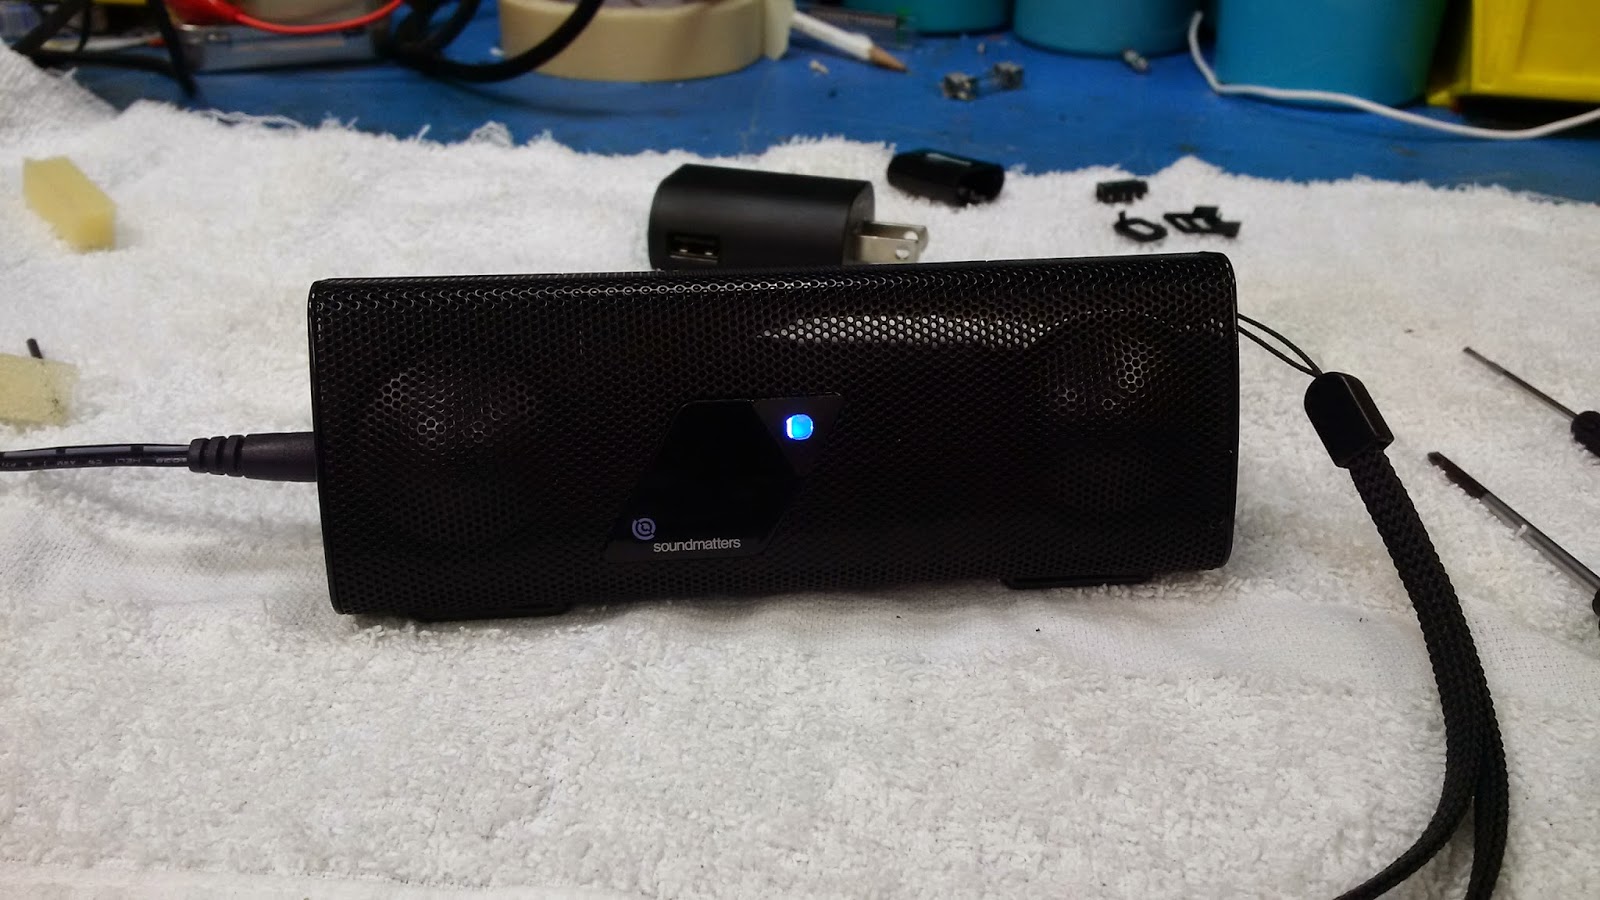
 6. That's it, you now have a FoxL Bluetooth speaker that can pair to any smart phone. Be very fussy about the shielding as the digital noise is still a small issue with mine but is fine for my quick setup/pool hall listening requirements.


Tuesday, March 4, 2014

Redirect Google Earth to use "myplaces.klm" stored on a NAS so that it is available and synced on all your computers and mobiles.


Thanks to:
http://mutterances.com/google-earth-change-location-of-my-places-kml-files/

Note: I use a Synology NAS running the Cloudstation package and have the client installed on all my PC but you could do the same thing with Dropbox.

The idea is to go into GE settings and change where the "myplaces.klm" is stored.
We instead store it in a cloudstation folder and it is available to all computers
running the cloustation client.

Here are the default file paths in Windows OSs for the GE "myplaces.klm" file.
C:\Documents and Settings\username\Application
Data\Google\GoogleEarth\myplaces.kml (XP)

C:\Users\username\AppData\Roaming\Google\GoogleEarth\myplaces.kml (Vista)

C:\users\username\appData\LocalLow\Google\GoogleEarth\myplaces.kml (Windows 8,
Windows 7 and later installations on Vista)

To re-assing the new location that GE will save to/read from the cloustation, do:
Regedit / "HKEY_CURRENT_USER\Software\Google\Google Earth Plus\KMLPath" and enter
new path to cloudstation location (or Dropbox).

Note:If you should want to manually copy the .klm file for any reason, make sure that 
Google Earth is exited in all computers that are running the cloudstation client.

That's it, your "myplaces.klm" file is current, synced and all your saved way-points are available to all your PCs and even your mobile devices, assuming you have a client for your NAS or Dropbox. installed on your mobile.
Cheers


Thursday, August 15, 2013

Laser Level "Extra Slow" rotation mode

I have a MasterCraft rotating laser level. This thing is incredibly handy for laying out partitions or T-bar ceilings but the one thing that always bugged me is that the rotation speed is to fast, even in the slowest setting. I brought it into the shop today and added a 2 position switch onto the DC feed to the rotation motor. One side is a straight connection, the other side directs the current through a pot, all I had in the shop was a 1k , 10-turn but a 10 - 20ohm, 2 turn would have been perfect.
Cheers
Rob


Friday, August 9, 2013

DIY Motorcycle Gear Position Indicator (GPI)

Well, I finally got around to building a Gear Position Indicator (GPI) for my Suzuki  V-strom motorcycle.

The project was based on the superb design and PIC programming skills of Pat at WhiskeyTangoHotel.com
Thanks Pat.


I pondered  for a while,  thinking how/where I was gonna mount the 7 seg display and came up with this setup. Its no perfect but very functional and looks kinda cool.

First,  I used the plastic casing from a capacitor that was about the correct size and cut it into shape.

 Then I found a clear plastic cover to go over the 7 seg display. 

Determined the color code and cct config, completed the soldering to the 7 seg display, made a back cover from a scrap peice of plastic layin round the shop and  finally glued everything together using epoxy.


The cct/box assy went under the seat. I already had a 12v relay setup under there to power my 12v accessory plug using the tail light as a trigger so I just hooked up the cct to that output and it comes on when I turn the key. 


This is where I had a bit of problem, well more like an oversight on my part.. "THE SIDE STAND NEEDS TO BE UP" for this pink wire to send the proper feedback voltages to the cct, if the side stand is not up, the voltages will not be correct and the GPI will not work. Note to self:: This is what happens when you read a cct description and your brain skips the last part of the sentence because it assumes it knows it...!!!   


I mounted the display with 2way tape onto the side of the brake fluid canister (made a little funky pizza shape wedge out of rubber to angle the display slightly).

The big test will be the waterproof test.

Note: As you may have noticed, the cct above has a temp sensing function that I did not implement on my design because I didn't have a waterproof switch and housing on hand but I plan on adding this part later on,  maybe that will be next years "farkling around" session.

Cheers and happy trails.
Rob

Tuesday, October 23, 2012

Winter barbecue removable cover

This project was to cover my grill (Napoleon Prestige Pro 500) during our harsh Canadian winters but still be able to use it on those perfect winter days. The tarp is held in place with bungee cords and rolls up to the back and rests on 2 hooks for storage. The top and front braces slide off and out of the way. Come spring time, un-screw from the deck, fold up and store till next fall.
All wood structure is standard wood strapping, 2-1/2" x 3/4". To fasten the wood joints, I used construction glue and 2-1/4" air gun nails to hold in place, then laid piece on concrete floor and applied small "gang nail strips" as you can see in the pics. I used 4 standard hinges to attache the sections together. To mount the removable top and front cross braces, I took a piece of 1-1/4" pipe about 2.5" long, split it in two, took one half, secured in the vise to bend the sides out a bit, then notched the center down about 2 inches, then drilled some screw holes on each side, grind the edges smooth, then screwed these mounts into position. On the brace ends, I just used 2" deck screw and left the head of the screw out a bit so that it slides into the notch of the galvanized mounts.
 For the tarp, I used an electric solder gun with the plastic cutting attachment to cut/melt the tarp to shape, then wrapped onto the wood strapping and stapled with 3/4" crown staples from air gun on low pressure (approx 60 psi). Don't forget to allow extra tarp for the folding of the sides. Then cut the top tarp to size, sewed a loop onto the bottom front to insert a piece of strapping (see pic). Installed grommets onto the sides of the tarp in proper locations, installed bungee cords using clothes line crimps. Install top tarp and permanently screw onto the back. Install screws on the side frame to hook the bungee cord onto.     


Youtube video of the project featuring the music of local fidler, Matt Hayes.

Happy Grilling.

Saturday, March 31, 2012

Lost ring in Treasure Island Florida "Rob Arsenault" written inside.

A bit of a bummer on our trip to Florida this year. On our stop at the Best Western in Treasure Island, I lost my graduation ring. It is a white gold ring with class of 2001 written on the front and the name "Rob Arsenault" inside. This rig is very dear to me because my mother bought this for me when I graduated and my dear mum passed away this past Dec. In fact, she was suppose to come with us to Florida, I had her tickets purchased and ready to go. She fell ill with a severe MRSA infection an did not make it.
I would gladly give a reward for the return of my ring. If you happen to find it, please contact me: mani1147@hotmail.com

God bless you mum.
Robert

Tuesday, April 12, 2011

ISA 428 Overheat fix

Update: The dual fan setup was effective but what a freekin racket....!!! So I brought out the big guns and installed a 4" silent fan on the top cover blowing inwards. Then I changed the regulator in my circuit to a 1708 bringing the voltage down from 12 to 8VDC. Did a 6 hour session last night, much quieter, cooler and no digi pops and querks.

Here is what we did with my ISA 428 preamp heat issue after installing an AD card. We added a heatsink (from an old 21" CRT, remember those...!!) with fan and some good heat transfer compound, a second smaller fan on the side wall (inside), a small rectifier/regulator circuit (***isolated from chassis ground) to power the fans and lastly, standoffs under the top cover to lift it up about a 1/2" and let more air in/out. Worked out great and all done from leftover recycled stuff laying around the shop.

Many thanks to Glenn L for the tech wizardry and Clovis L for the milling magic.